|
Profilometer
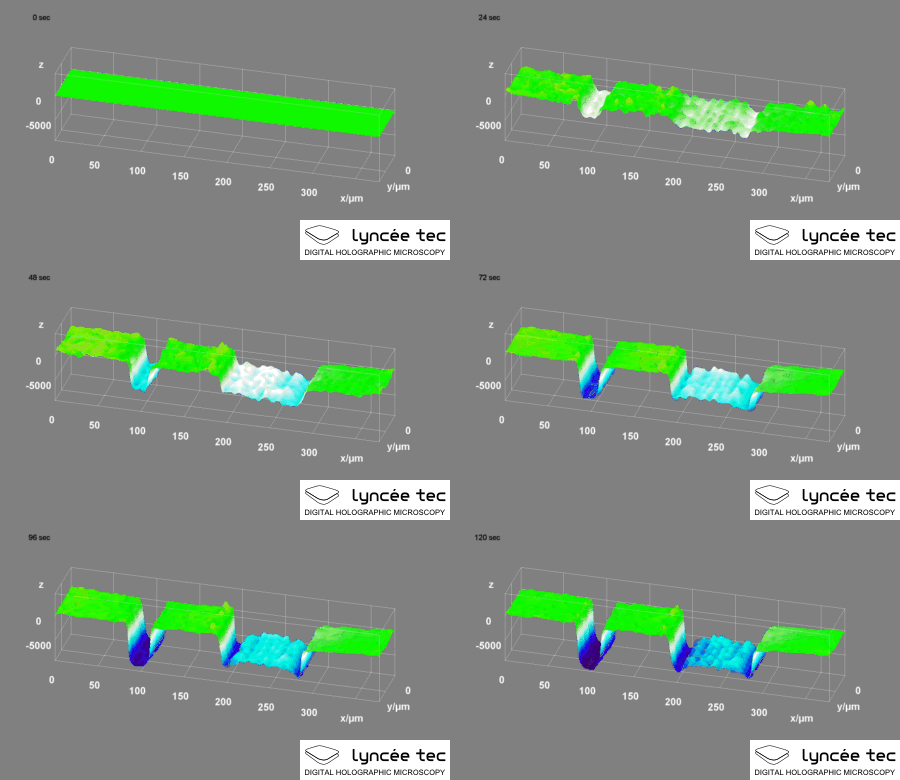
A profilometer is a measuring instrument used to measure a surface's profile, in order to quantify its roughness. Critical dimensions as step, curvature, flatness are computed from the surface topography. While the historical notion of a profilometer was a device similar to a phonograph that measures a surface as the surface is moved relative to the contact profilometer's stylus, this notion is changing with the emergence of numerous non-contact profilometry techniques. Non-scanning technologies measure the surface topography within a single camera acquisition, XYZ scanning is no longer needed. As a consequence, dynamic changes of topography are measured in real-time. Contemporary profilometers are not only measuring static topography, but now also dynamic topography – such systems are described as time-resolved profilometers. Types Optical methodsJean M. Bennett, Lars Mattsson, Introduction to Surface Roughness and Scattering, Optical Society of America, Washington, D.C ... [...More Info...] [...Related Items...] OR: [Wikipedia] [Google] [Baidu] |
Digital Holographic Microscopy
Digital holographic microscopy (DHM) is digital holography applied to microscopy. Digital holographic microscopy distinguishes itself from other microscopy methods by not recording the projected image of the object. Instead, the light wave front information originating from the object is digitally recorded as a hologram, from which a computer calculates the object image by using a numerical reconstruction algorithm. The image forming lens (optics), lens in traditional microscopy is thus replaced by a computer algorithm. Other closely related microscopy methods to digital holographic microscopy are interferometric microscopy, optical coherence tomography and diffraction phase microscopy. Common to all methods is the use of a reference wave front to obtain amplitude (intensity) ''and'' phase (waves), phase information. The information is recorded on a digital image sensor or by a photodetector from which an image of the object is created (reconstructed) by a computer. In traditional ... [...More Info...] [...Related Items...] OR: [Wikipedia] [Google] [Baidu] |
Surface Finish
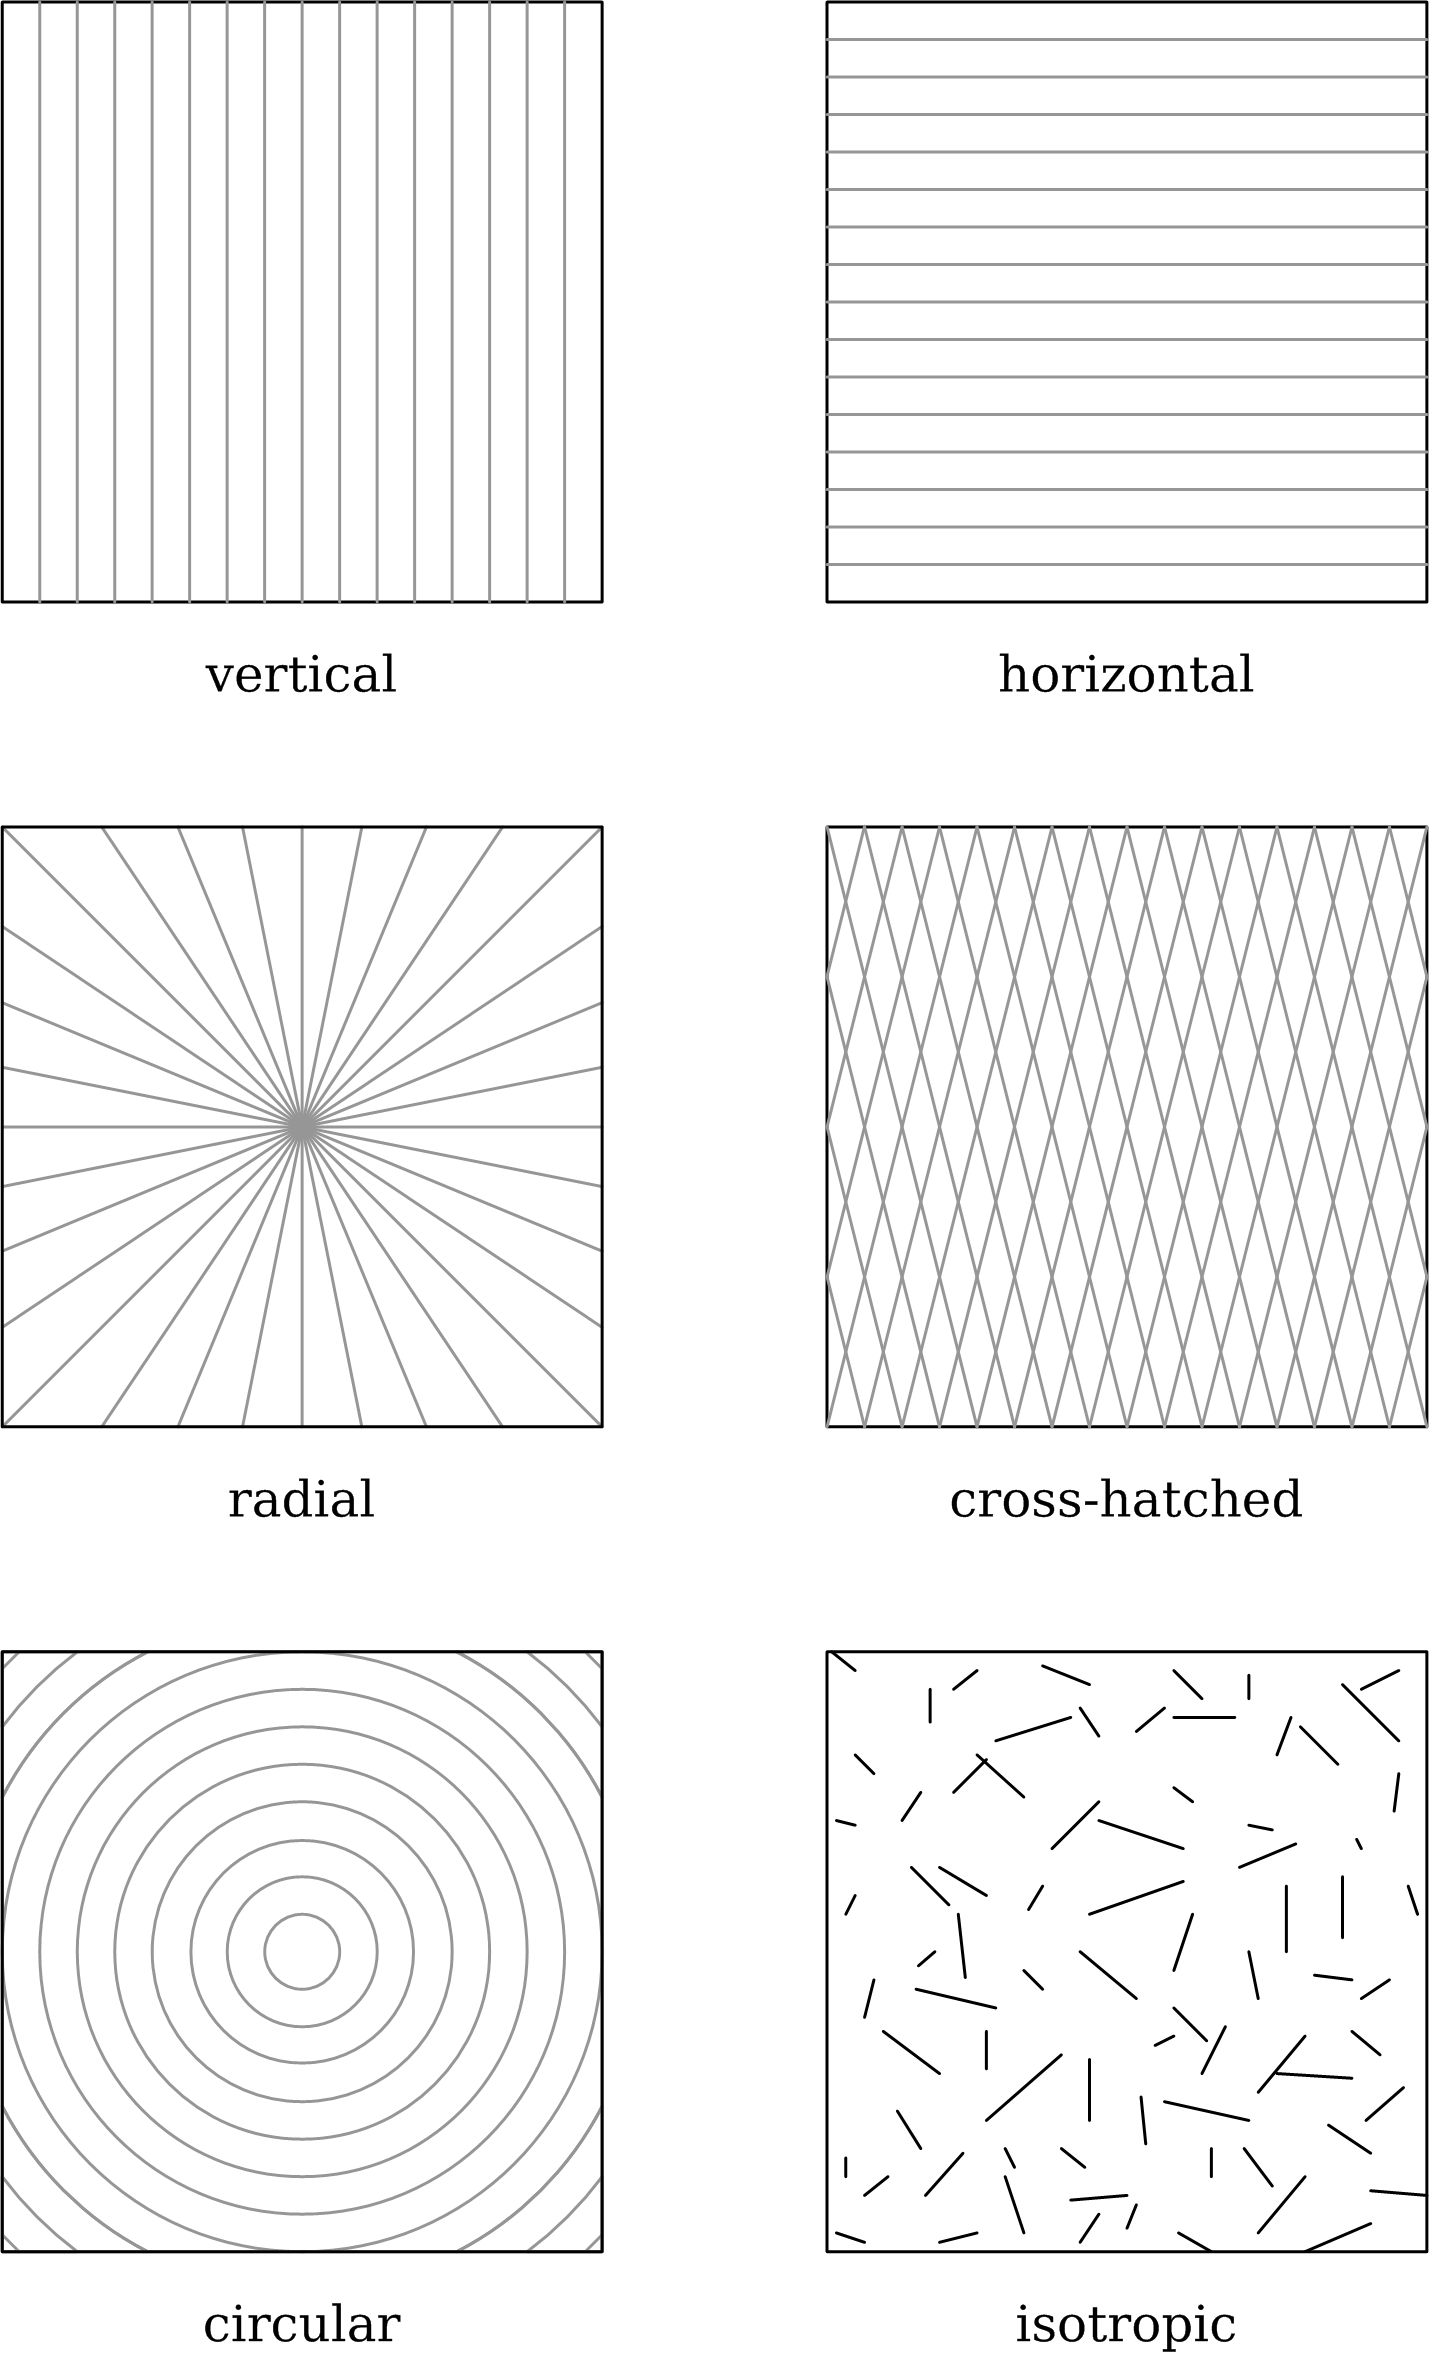
Surface finish, also known as surface texture or surface topography, is the nature of a interface (matter), surface as defined by the three characteristics of lay, surface roughness, and waviness.. It comprises the small, local deviations of a surface from the perfectly Flat space, flat ideal (a true plane (geometry), plane). Surface texture is one of the important factors that control friction and transfer layer formation during sliding. Considerable efforts have been made to study the influence of surface texture on friction and wear during sliding conditions. Surface textures can be isotropy, isotropic or anisotropy, anisotropic. Sometimes, stick-slip friction phenomena can be observed during sliding, depending on surface texture. Each manufacturing process (such as the many kinds of machining) produces a surface texture. The process is usually optimized to ensure that the resulting texture is usable. If necessary, an additional process will be added to modify the initial te ... [...More Info...] [...Related Items...] OR: [Wikipedia] [Google] [Baidu] |
Surface Roughness
Surface roughness or simply roughness is the quality of a surface of not being smooth and it is hence linked to human ( haptic) perception of the surface texture. From a mathematical perspective it is related to the spatial variability structure of surfaces, and inherently it is a multiscale property. It has different interpretations and definitions depending on the disciplines considered. In surface metrology, surface roughness is a component of surface finish (surface texture). It is quantified by the deviations in the direction of the normal vector of a real surface from its ideal form. If these deviations are large, the surface is rough; if they are small, the surface is smooth. Roughness is typically assumed to be the high-frequency, short-wavelength component of a measured surface. However, in practice it is often necessary to know both the amplitude and frequency to ensure that a surface is fit for a purpose. Role and effect Roughness plays an important role in determin ... [...More Info...] [...Related Items...] OR: [Wikipedia] [Google] [Baidu] |
Pattern Reflection Methods
A pattern is a regularity in the world, in human-made design, or in abstract ideas. As such, the elements of a pattern repeat in a predictable manner. A geometric pattern is a kind of pattern formed of geometric shapes and typically repeated like a wallpaper design. Any of the senses may directly observe patterns. Conversely, abstract patterns in science, mathematics, or language may be observable only by analysis. Direct observation in practice means seeing visual patterns, which are widespread in nature and in art. Visual patterns in nature are often chaotic, rarely exactly repeating, and often involve fractals. Natural patterns include spirals, meanders, waves, foams, tilings, cracks, and those created by symmetries of rotation and reflection. Patterns have an underlying mathematical structure; indeed, mathematics can be seen as the search for regularities, and the output of any function is a mathematical pattern. Similarly in the sciences, theories explain and predict regu ... [...More Info...] [...Related Items...] OR: [Wikipedia] [Google] [Baidu] |
Atomic Force Microscopy
Atomic force microscopy (AFM) or scanning force microscopy (SFM) is a very-high-resolution type of scanning probe microscopy (SPM), with demonstrated resolution on the order of fractions of a nanometer, more than 1000 times better than the optical diffraction limit. Overview Atomic force microscopy (AFM) gathers information by "feeling" or "touching" the surface with a mechanical probe. Piezoelectric elements that facilitate tiny but accurate and precise movements on (electronic) command enable precise scanning. Despite the name, the Atomic Force Microscope does not use the nuclear force. Abilities and spatial resolution The AFM has three major abilities: force measurement, topographic imaging, and manipulation. In force measurement, AFMs can be used to measure the forces between the probe and the sample as a function of their mutual separation. This can be applied to perform force spectroscopy, to measure the mechanical properties of the sample, such as the sample's Youn ... [...More Info...] [...Related Items...] OR: [Wikipedia] [Google] [Baidu] |
Scanning Tunneling Microscopy
A scanning tunneling microscope (STM) is a type of scanning probe microscope used for imaging surfaces at the atomic level. Its development in 1981 earned its inventors, Gerd Binnig and Heinrich Rohrer, then at IBM Zürich, the Nobel Prize in Physics in 1986. STM senses the surface by using an extremely sharp conducting tip that can distinguish features smaller than 0.1 nm with a 0.01 nm (10 pm) depth resolution. This means that individual atoms can routinely be imaged and manipulated. Most scanning tunneling microscopes are built for use in ultra-high vacuum at temperatures approaching absolute zero, but variants exist for studies in air, water and other environments, and for temperatures over 1000 °C. STM is based on the concept of quantum tunneling. When the tip is brought very near to the surface to be examined, a bias voltage applied between the two allows electrons to tunnel through the vacuum separating them. The resulting ''tunneling current' ... [...More Info...] [...Related Items...] OR: [Wikipedia] [Google] [Baidu] |
Triangulation Sensor
In trigonometry and geometry, triangulation is the process of determining the location of a point by forming triangles to the point from known points. Applications In surveying Specifically in surveying, triangulation involves only angle measurements at known points, rather than measuring distances to the point directly as in trilateration; the use of both angles and distance measurements is referred to as triangulateration. In computer vision Computer stereo vision and optical 3D measuring systems use this principle to determine the spatial dimensions and the geometry of an item. Basically, the configuration consists of two sensors observing the item. One of the sensors is typically a digital camera device, and the other one can also be a camera or a light projector. The projection centers of the sensors and the considered point on the object's surface define a (spatial) triangle. Within this triangle, the distance between the sensors is the base ''b'' and must be known ... [...More Info...] [...Related Items...] OR: [Wikipedia] [Google] [Baidu] |
Digital Holography
Digital holography is the acquisition and processing of holograms with a digital sensor array, typically a CCD camera or a similar device. Image rendering, or reconstruction of object ''data'' is performed numerically from digitized interferograms. Digital holography offers a means of measuring optical phase data and typically delivers three-dimensional surface or optical thickness images. Several recording and processing schemes have been developed to assess optical wave characteristics such as amplitude, phase, and polarization state, which make digital holography a very powerful method for metrology applications . Digital recording and processing of holograms Off-axis configuration In the off-axis configuration, a small angle between the reference and the object beams is used to prevent overlapping of the cross-beating contributions between the object and reference optical fields with the self-beating contributions of these fields. These discoveries were made by Emmett Leith ... [...More Info...] [...Related Items...] OR: [Wikipedia] [Google] [Baidu] |
Fourier Profilometry
Fourier profilometry is a method for measuring profiles using distortions in periodic patterns. The method uses Fourier analysis (a 2-dimensional fast Fourier transform) to determine localized slopes on a curving surface. This allows a ''x'', ''y'', ''z'' coordinate system of the surface to be generated from a single image which has been overlaid with the distortion pattern. It is used specifically in measuring the shape of the human cornea for use in contact lens Contact lenses, or simply contacts, are thin lenses placed directly on the surface of the eyes. Contact lenses are ocular prosthetic devices used by over 150 million people worldwide, and they can be worn to correct vision or for cosmetic ... design. References {{reflist Optical metrology ... [...More Info...] [...Related Items...] OR: [Wikipedia] [Google] [Baidu] |


