Metallography on:
[Wikipedia]
[Google]
[Amazon]
Metallography is the study of the physical structure and components of
 After mounting, the specimen is wet ground to reveal the surface of the metal. The specimen is successively ground with finer and finer abrasive media.


 Some of the most basic measurements include determination of the
An Introduction to Sample Preparation for Metallography
Cambridge University. * Video on metallograph
Metallography Part I - Macroscopic Techniques
Karlsruhe University of Applied Sciences. * Video on metallograph
Metallography Part II - Microscopic Techniques
Karlsruhe University of Applied Sciences. Materials testing Metallurgy
metal
A metal (from Greek μέταλλον ''métallon'', "mine, quarry, metal") is a material that, when freshly prepared, polished, or fractured, shows a lustrous appearance, and conducts electricity and heat relatively well. Metals are typicall ...
s, by using microscopy.
Ceramic
A ceramic is any of the various hard, brittle, heat-resistant and corrosion-resistant materials made by shaping and then firing an inorganic, nonmetallic material, such as clay, at a high temperature. Common examples are earthenware, porcelain ...
and polymer
A polymer (; Greek '' poly-'', "many" + ''-mer'', "part")
is a substance or material consisting of very large molecules called macromolecules, composed of many repeating subunits. Due to their broad spectrum of properties, both synthetic a ...
ic materials may also be prepared using metallographic techniques, hence the terms ceramography
Ceramography is the art and science of preparation, examination and evaluation of ceramic microstructures. Ceramography can be thought of as the metallography of ceramics. The microstructure is the structure level of approximately 0.1 to 100 µm, b ...
, plastography and, collectively, materialography.
Preparing metallographic specimens
The surface of a metallographic specimen is prepared by various methods ofgrinding
Grind is the cross-sectional shape of a blade.
Grind, grinds, or grinding may also refer to:
Grinding action
* Grinding (abrasive cutting), a method of crafting
* Grinding (dance), suggestive club dancing
* Grinding (video gaming), repetitive and ...
, polishing, and etching
Etching is traditionally the process of using strong acid or mordant to cut into the unprotected parts of a metal surface to create a design in intaglio (incised) in the metal. In modern manufacturing, other chemicals may be used on other types ...
. After preparation, it is often analyzed using optical
Optics is the branch of physics that studies the behaviour and properties of light, including its interactions with matter and the construction of instruments that use or detect it. Optics usually describes the behaviour of visible, ultravio ...
or electron microscopy. Using only metallographic techniques, a skilled technician can identify alloy
An alloy is a mixture of chemical elements of which at least one is a metal. Unlike chemical compounds with metallic bases, an alloy will retain all the properties of a metal in the resulting material, such as electrical conductivity, ductilit ...
s and predict material properties
A materials property is an intensive property of a material, i.e., a physical property that does not depend on the amount of the material. These quantitative properties may be used as a metric by which the benefits of one material versus another c ...
.
Mechanical preparation is the most common preparation method. Successively finer abrasive
An abrasive is a material, often a mineral, that is used to shape or finish a workpiece through rubbing which leads to part of the workpiece being worn away by friction. While finishing a material often means polishing it to gain a smooth, reflec ...
particles are used to remove material from the sample surface until the desired surface quality is achieved. Many different machines are available for doing this grinding and polishing, which are able to meet different demands for quality, capacity, and reproducibility.
A systematic preparation method is the easiest way to achieve the true structure. Sample preparation must therefore pursue rules which are suitable for most materials. Different materials with similar properties (hardness
In materials science, hardness (antonym: softness) is a measure of the resistance to localized plastic deformation induced by either mechanical indentation or abrasion. In general, different materials differ in their hardness; for example hard ...
and ductility
Ductility is a mechanical property commonly described as a material's amenability to drawing (e.g. into wire). In materials science, ductility is defined by the degree to which a material can sustain plastic deformation under tensile str ...
) will respond alike and thus require the same consumables
Consumables (also known as consumable goods, non-durable goods, or soft goods) are goods that are intended to be consumed. People have, for example, always consumed food and water. Consumables are in contrast to durable goods. Disposable products ...
during preparation.
Metallographic specimens are typically "mounted" using a hot compression thermosetting resin. In the past, phenolic thermosetting resins have been used, but modern epoxy is becoming more popular because reduced shrinkage during curing results in a better mount with superior edge retention. A typical mounting cycle will compress the specimen and mounting media to and heat to a temperature of . When specimens are very sensitive to temperature, "cold mounts" may be made with a two-part epoxy resin. Mounting a specimen provides a safe, standardized, and ergonomic
Human factors and ergonomics (commonly referred to as human factors) is the application of psychological and physiological principles to the engineering and design of products, processes, and systems. Four primary goals of human factors learnin ...
way by which to hold a sample during the grinding and polishing operations.
Silicon carbide
Silicon carbide (SiC), also known as carborundum (), is a hard chemical compound containing silicon and carbon. A semiconductor, it occurs in nature as the extremely rare mineral moissanite, but has been mass-produced as a powder and crystal s ...
abrasive paper was the first method of grinding and is still used today. Many metallographers, however, prefer to use a diamond grit suspension which is dosed onto a reusable fabric pad throughout the polishing process. Diamond grit in suspension might start at 9 micrometre
The micrometre ( international spelling as used by the International Bureau of Weights and Measures; SI symbol: μm) or micrometer (American spelling), also commonly known as a micron, is a unit of length in the International System of Unit ...
s and finish at one micrometre. Generally, polishing with diamond suspension gives finer results than using silicon carbide papers (SiC papers), especially with revealing porosity
Porosity or void fraction is a measure of the void (i.e. "empty") spaces in a material, and is a fraction of the volume of voids over the total volume, between 0 and 1, or as a percentage between 0% and 100%. Strictly speaking, some tests measur ...
, which silicon carbide paper sometimes "smear" over. After grinding the specimen, polishing is performed. Typically, a specimen is polished with a slurry of alumina, silica
Silicon dioxide, also known as silica, is an oxide of silicon with the chemical formula , most commonly found in nature as quartz and in various living organisms. In many parts of the world, silica is the major constituent of sand. Silica is ...
, or diamond
Diamond is a solid form of the element carbon with its atoms arranged in a crystal structure called diamond cubic. Another solid form of carbon known as graphite is the chemically stable form of carbon at room temperature and pressure, ...
on a napless cloth to produce a scratch-free mirror finish, free from smear, drag, or pull-outs and with minimal deformation remaining from the preparation process.
After polishing, certain microstructural constituents can be seen with the microscope, e.g., inclusions and nitrides. If the crystal structure is non-cubic (e.g., a metal with a hexagonal-closed packed crystal structure, such as Ti or Zr) the microstructure can be revealed without etching using crossed polarized light (light microscopy). Otherwise, the microstructural constituents of the specimen are revealed by using a suitable chemical or electrolytic etchant.
Non-destructive surface analysis techniques can involve applying a thin film or varnish that can be peeled off after drying and examined under a microscope. The technique was developed by Pierre Armand Jacquet and others in 1957.
Analysis techniques
Many different microscopy techniques are used in metallographic analysis. Prepared specimens should be examined with the unaided eye after etching to detect any visible areas that have responded to the etchant differently from the norm as a guide to where microscopical examination should be employed. Light optical microscopy (LOM) examination should always be performed prior to any electron metallographic (EM) technique, as these are more time-consuming to perform and the instruments are much more expensive. Further, certain features can be best observed with the LOM, e.g., the natural color of a constituent can be seen with the LOM but not with EM systems. Also, image contrast of microstructures at relatively low magnifications, e.g., <500X, is far better with the LOM than with the scanning electron microscope (SEM), while transmission electron microscopes (TEM) generally cannot be utilized at magnifications below about 2000 to 3000X. LOM examination is fast and can cover a large area. Thus, the analysis can determine if the more expensive, more time-consuming examination techniques using the SEM or the TEM are required and where on the specimen the work should be concentrated.Design, resolution, and image contrast
Light microscopes are designed for placement of the specimen's polished surface on the specimen stage either upright or inverted. Each type has advantages and disadvantages. Most LOM work is done at magnifications between 50 and 1000X. However, with a good microscope, it is possible to perform examination at higher magnifications, e.g., 2000X, and even higher, as long as diffraction fringes are not present to distort the image. However, the resolution limit of the LOM will not be better than about 0.2 to 0.3 micrometers. Special methods are used at magnifications below 50X, which can be very helpful when examining the microstructure of cast specimens where greater spatial coverage in the field of view may be required to observe features such asdendrites
Dendrites (from Greek δένδρον ''déndron'', "tree"), also dendrons, are branched protoplasmic extensions of a nerve cell that propagate the electrochemical stimulation received from other neural cells to the cell body, or soma, of the ...
.
Besides considering the resolution of the optics, one must also maximize visibility by maximizing image contrast. A microscope with excellent resolution may not be able to image a structure, that is there is no visibility, if image contrast is poor. Image contrast depends upon the quality of the optics, coatings on the lenses, and reduction of flare and glare; but, it also requires proper specimen preparation and good etching techniques. So, obtaining good images requires maximum resolution and image contrast.


Bright- and dark-field microscopy
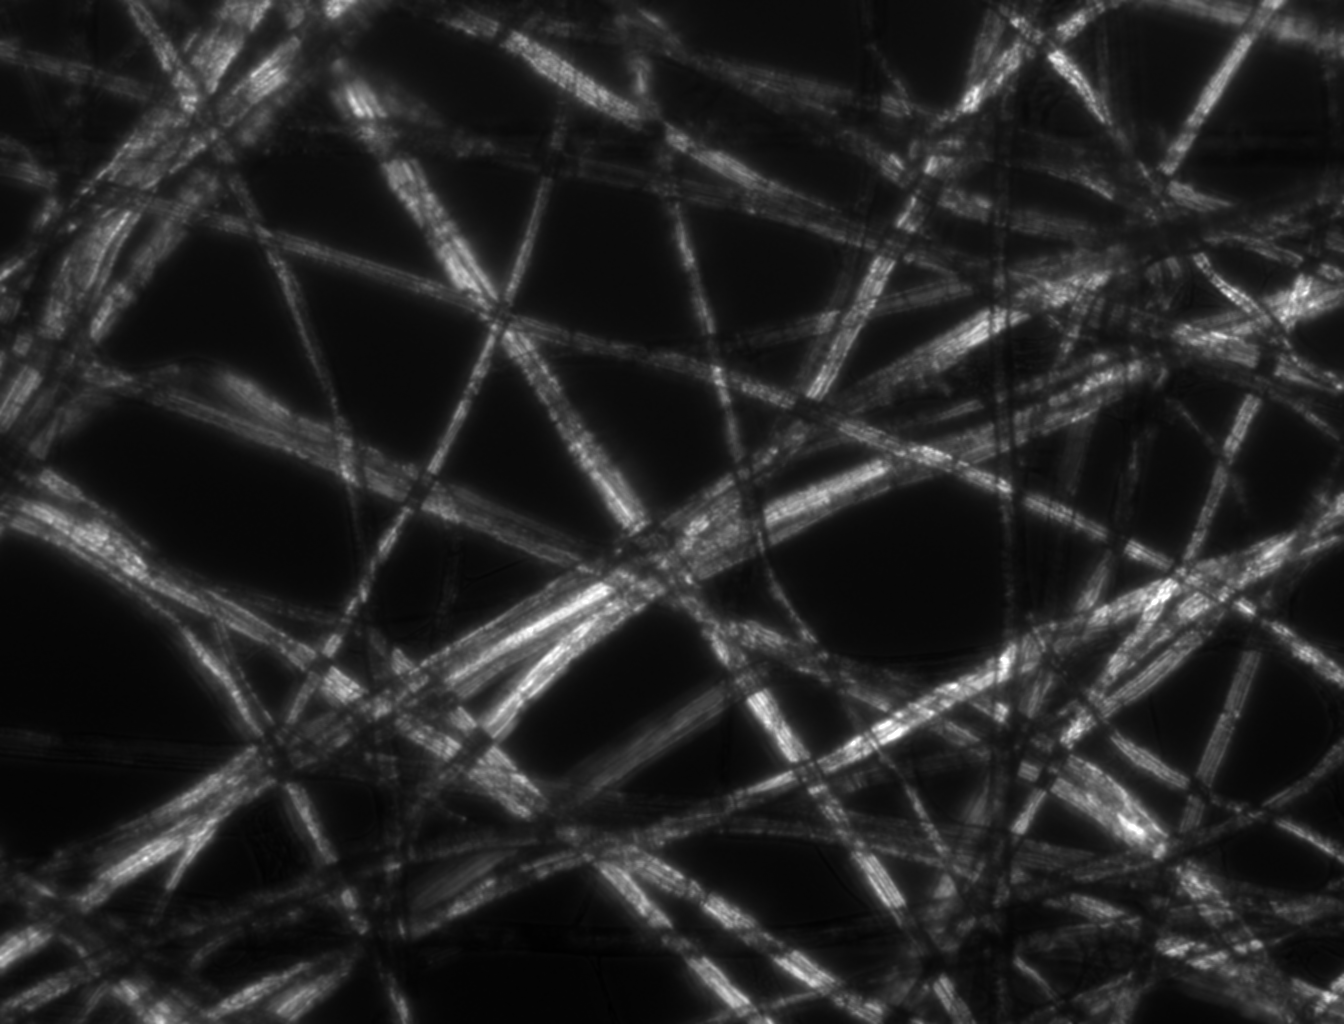
Most LOM observations are conducted using bright-field (BF) illumination, where the image of any flat feature perpendicular to the incident light path is bright, or appears to be white. But, other illumination methods can be used and, in some cases, may provide superior images with greater detail. Dark-field microscopy (DF), is an alternative method of observation that provides high-contrast images and actually greater resolution than bright-field. In dark-field illumination, the light from features perpendicular to the optical axis is blocked and appears dark while the light from features inclined to the surface, which look dark in BF, appear bright, or "self-luminous" in DF.Grain boundaries
In materials science, a grain boundary is the interface between two grains, or crystallites, in a polycrystalline material. Grain boundaries are two-dimensional defects in the crystal structure, and tend to decrease the electrical and thermal ...
, for example, are more vivid in DF than BF.
Polarized light microscopy
Polarized light (PL) is very useful when studying the structure of metals with non-cubiccrystal structure
In crystallography, crystal structure is a description of the ordered arrangement of atoms, ions or molecules in a crystalline material. Ordered structures occur from the intrinsic nature of the constituent particles to form symmetric patterns ...
s (mainly metals with hexagonal close-packed
In geometry, close-packing of equal spheres is a dense arrangement of congruent spheres in an infinite, regular arrangement (or lattice). Carl Friedrich Gauss proved that the highest average density – that is, the greatest fraction of space occu ...
(hcp) crystal structures). If the specimen is prepared with minimal damage to the surface, the structure can be seen vividly in cross-polarized light (the optic axis of the polarizer and analyzer are 90 degrees to each other, i.e., crossed). In some cases, an hcp metal can be chemically etched and then examined more effectively with PL. Tint etched surfaces, where a thin film (such as a sulfide, molybdate, chromate or elemental selenium
Selenium is a chemical element with the symbol Se and atomic number 34. It is a nonmetal (more rarely considered a metalloid) with properties that are intermediate between the elements above and below in the periodic table, sulfur and tellurium, ...
film) is grown epitaxially
Epitaxy refers to a type of crystal growth or material deposition in which new crystalline layers are formed with one or more well-defined orientations with respect to the crystalline seed layer. The deposited crystalline film is called an epit ...
on the surface to a depth where interference effects are created when examined with BF producing color images, can be improved with PL. If it is difficult to get a good interference film with good coloration, the colors can be improved by examination in PL using a sensitive tint (ST) filter.
Differential interference contrast microscopy
Another useful imaging mode is differential interference contrast (DIC), which is usually obtained with a system designed by the Polish physicistGeorges Nomarski Georges (Jerzy) Nomarski (January 6, 1919 – 1997) was a Polish physicist and optics theoretician. Creator of differential interference contrast (DIC) microscopy, the method is widely used to study live biological specimens and unstained tissues a ...
. This system gives the best detail. DIC converts minor height differences on the plane-of-polish, invisible in BF, into visible detail. The detail in some cases can be quite striking and very useful. If an ST filter is used along with a Wollaston prism
A Wollaston prism is an optical device, invented by William Hyde Wollaston, that manipulates polarized light. It separates light into two separate linearly polarized outgoing beams with orthogonal polarization. The two beams will be polarized a ...
, color is introduced. The colors are controlled by the adjustment of the Wollaston prism, and have no specific physical meaning, per se. But, visibility may be better.
Oblique illumination
DIC has largely replaced the older oblique illumination (OI) technique, which was available on reflected light microscopes prior to about 1975. In OI, the vertical illuminator is offset from perpendicular, producing shading effects that reveal height differences. This procedure reduces resolution and yields uneven illumination across the field of view. Nevertheless, OI was useful when people needed to know if a second phase particle was standing above or was recessed below the plane-of-polish, and is still available on a few microscopes. OI can be created on any microscope by placing a piece of paper under one corner of the mount so that the plane-of-polish is no longer perpendicular to the optical axis.Scanning electron and transmission electron microscopes
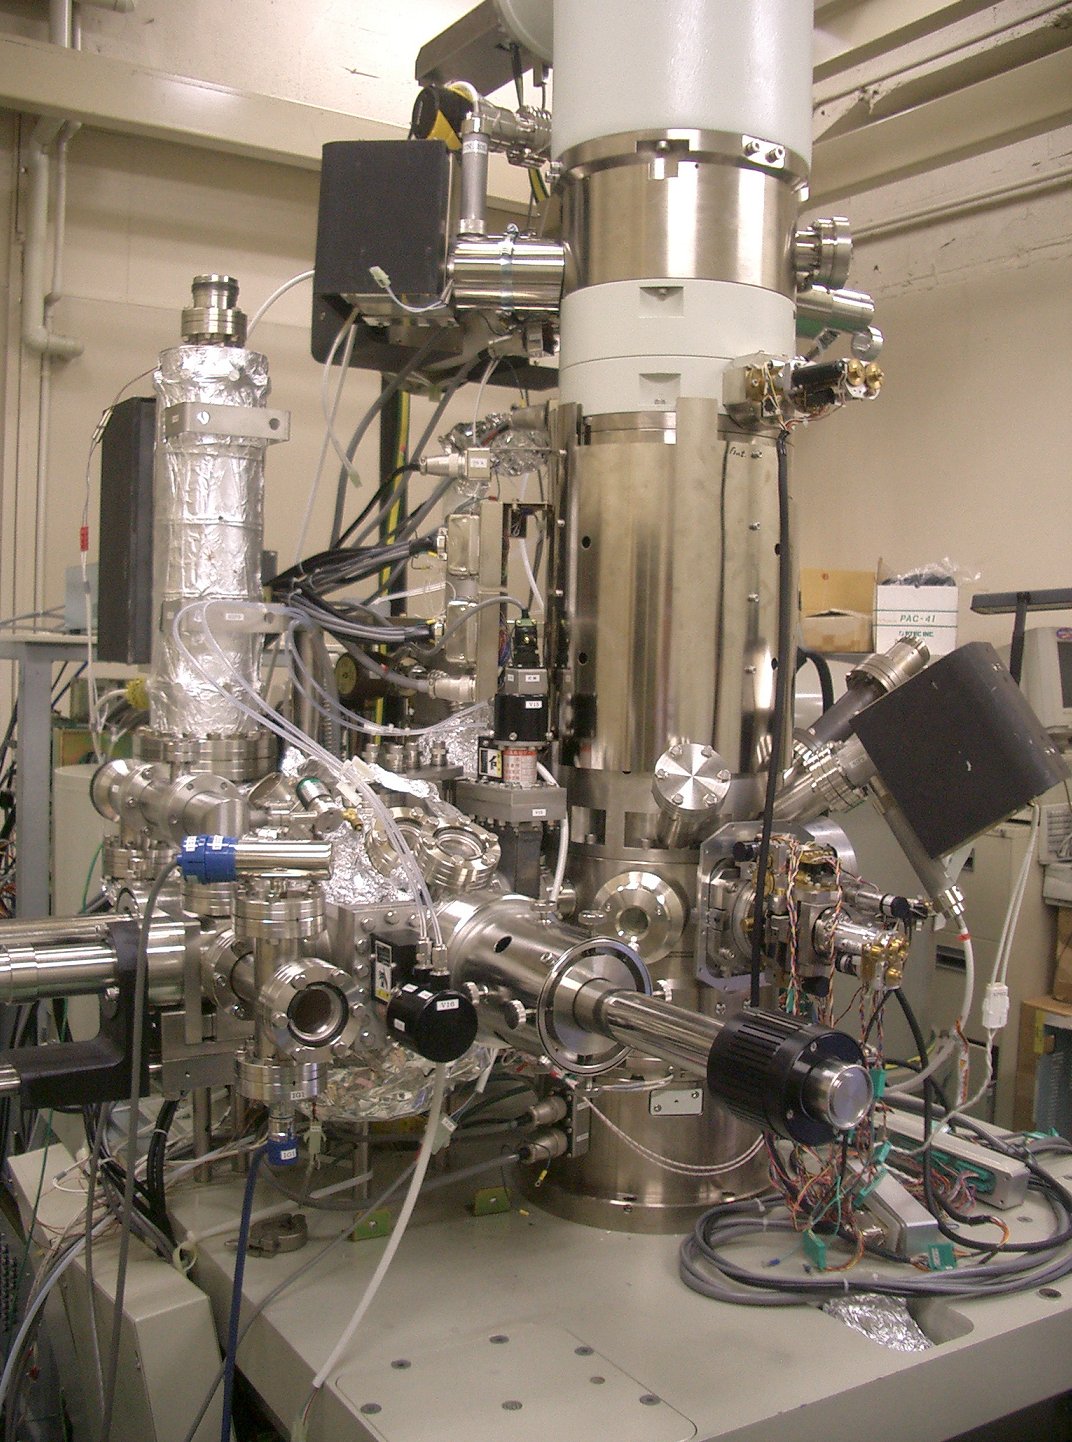
If a specimen must be observed at higher magnification, it can be examined with a scanning electron microscope (SEM), or a transmission electron microscope (TEM). When equipped with an energy dispersive spectrometer (EDS), the chemical composition of the microstructural features can be determined. The ability to detect low-atomic number elements, such ascarbon
Carbon () is a chemical element with the symbol C and atomic number 6. It is nonmetallic and tetravalent—its atom making four electrons available to form covalent chemical bonds. It belongs to group 14 of the periodic table. Carbon mak ...
, oxygen
Oxygen is the chemical element with the symbol O and atomic number 8. It is a member of the chalcogen group in the periodic table, a highly reactive nonmetal, and an oxidizing agent that readily forms oxides with most elements as ...
, and nitrogen
Nitrogen is the chemical element with the symbol N and atomic number 7. Nitrogen is a nonmetal and the lightest member of group 15 of the periodic table, often called the pnictogens. It is a common element in the universe, estimated at se ...
, depends upon the nature of the detector used. But, quantification of these elements by EDS is difficult and their minimum detectable limits are higher than when a wavelength-dispersive spectrometer (WDS) is used. But quantification of composition by EDS has improved greatly over time. The WDS system has historically had better sensitivity (ability to detect low amounts of an element) and ability to detect low-atomic weight elements, as well as better quantification of compositions, compared to EDS, but it was slower to use. Again, in recent years, the speed required to perform WDS analysis has improved substantially. Historically, EDS was used with the SEM while WDS was used with the electron microprobe analyzer (EMPA). Today, EDS and WDS is used with both the SEM and the EMPA. However, a dedicated EMPA is not as common as an SEM.

X-ray diffraction techniques
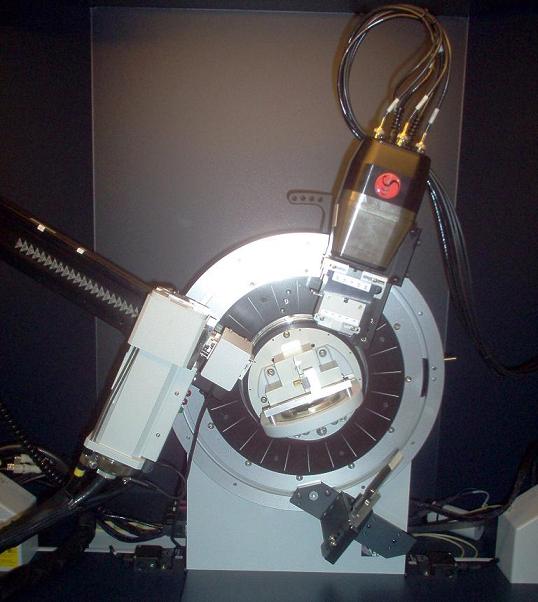
Characterization of microstructures has also been performed using x-ray diffraction (XRD) techniques for many years. XRD can be used to determine the percentages of various phases present in a specimen if they have different crystal structures. For example, the amount of retained austenite in ahardened steel
The term hardened steel is often used for a medium or high carbon steel that has been given heat treatment and then quenching followed by tempering. The quenching results in the formation of metastable martensite, the fraction of which is reduced ...
is best measured using XRD (ASTM E 975). If a particular phase can be chemically extracted from a bulk specimen, it can be identified using XRD based on the crystal structure and lattice dimensions. This work can be complemented by EDS and/or WDS analysis where the chemical composition is quantified. But EDS and WDS are difficult to apply to particles less than 2-3 micrometers in diameter. For smaller particles, diffraction techniques can be performed using the TEM for identification and EDS can be performed on small particles if they are extracted from the matrix using replication methods to avoid detection of the matrix along with the precipitate.
Quantitative metallography
A number of techniques exist to quantitatively analyze metallographic specimens. These techniques are valuable in the research and production of allmetal
A metal (from Greek μέταλλον ''métallon'', "mine, quarry, metal") is a material that, when freshly prepared, polished, or fractured, shows a lustrous appearance, and conducts electricity and heat relatively well. Metals are typicall ...
s and alloy
An alloy is a mixture of chemical elements of which at least one is a metal. Unlike chemical compounds with metallic bases, an alloy will retain all the properties of a metal in the resulting material, such as electrical conductivity, ductilit ...
s and non-metallic or composite materials
A composite material (also called a composition material or shortened to composite, which is the common name) is a material which is produced from two or more constituent materials. These constituent materials have notably dissimilar chemical or ...
.
Microstructural quantification is performed on a prepared, two-dimensional plane through the three-dimensional part or component. Measurements may involve simple metrology techniques, e.g., the measurement of the thickness of a surface coating, or the apparent diameter of a discrete second-phase particle, (for example, spheroidal graphite
Graphite () is a crystalline form of the element carbon. It consists of stacked layers of graphene. Graphite occurs naturally and is the most stable form of carbon under standard conditions. Synthetic and natural graphite are consumed on lar ...
in ductile iron
Ductile iron, also known as ductile cast iron, nodular cast iron, spheroidal graphite iron, spheroidal graphite cast iron and SG iron, is a type of graphite-rich cast iron discovered in 1943 by Keith Millis. While most varieties of cast iron are ...
). Measurement may also require application of stereology
Stereology is the three-dimensional interpretation of two-dimensional cross sections of materials or tissues. It provides practical techniques for extracting quantitative information about a three-dimensional material from measurements made on two ...
to assess matrix and second-phase structures. Stereology is the field of taking 0-, 1- or 2-dimensional measurements on the two-dimensional sectioning plane and estimating the amount, size, shape or distribution of the microstructure in three dimensions. These measurements may be made using manual procedures with the aid of templates overlaying the microstructure, or with automated image analyzers. In all cases, adequate sampling must be made to obtain a proper statistical basis for the measurement. Efforts to eliminate bias are required.
 Some of the most basic measurements include determination of the
 volume fraction
In chemistry and fluid mechanics, the volume fraction φ''i'' is defined as the volume of a constituent ''V'i'' divided by the volume of all constituents of the mixture ''V'' prior to mixing:
:\phi_i = \frac
Being dimensionless, its unit is ...
of a phase or constituent, measurement of the grain size in polycrystal
A crystallite is a small or even microscopic crystal which forms, for example, during the cooling of many materials. Crystallites are also referred to as grains.
Bacillite is a type of crystallite. It is rodlike with parallel longulites.
Stru ...
line metals and alloys, measurement of the size and size distribution of particles, assessment of the shape of particles, and spacing between particles.
Standards organizations, including ASTM International
ASTM International, formerly known as American Society for Testing and Materials, is an international standards organization that develops and publishes voluntary consensus technical standards for a wide range of materials, products, systems, ...
's Committee E-4 on Metallography and some other national and international organizations, have developed standard test methods describing how to characterize microstructure
Microstructure is the very small scale structure of a material, defined as the structure of a prepared surface of material as revealed by an optical microscope above 25× magnification. The microstructure of a material (such as metals, polymers ...
s quantitatively.
For example, the amount of a phase or constituent, that is, its volume fraction, is defined in ASTM E 562; manual grain size measurements are described in ASTM E 112 ( equiaxed grain structures with a single size distribution) and E 1182 (specimens with a bi-modal grain size distribution); while ASTM E 1382 describes how any grain size type or condition can be measured using image analysis methods. Characterization of nonmetallic inclusions using standard charts is described in ASTM E 45 (historically, E 45 covered only manual chart methods and an image analysis method for making such chart measurements was described in ASTM E 1122. The image analysis methods are currently being incorporated into E 45). A stereological method for characterizing discrete second-phase particles, such as nonmetallic inclusions, carbides, graphite, etc., is presented in ASTM E 1245.
See also
*Henry Clifton Sorby
Henry Clifton Sorby (10 May 1826 – 9 March 1908) was an English microscopist and geologist. His major contribution was the development of techniques for studying iron and steel with microscopes. This paved the way for the mass production of st ...
* Holger F. Struer
References
{{commons category, Metallography * "Metallographic and Materialographic Specimen Preparation, Light Microscopy, Image Analysis and Hardness Testing", Kay Geels in collaboration with Struers A/S, ASTM International 2006. * Metallography and Microstructures, Vol. 9, ASM Handbook, ASM International, Materials Park, OH, 2005. * Metallography: Principles and Practice, G. F. Vander Voort, ASM International, Materials Park, OH, 1999. * Vol. 03.01 of the ASTM Standards covers standards devoted to metallography (and mechanical property testing) * G. Petzow, ''Metallographic Etching'', 2nd Ed., ASM International, 1999. * Metalog Guide, L. Bjerregaard, K. Geels, B. Ottesen, M. Rückert, Struers A/S, Copenhagen, Denmark, 2000.External links
* HKDH BhadeshiAn Introduction to Sample Preparation for Metallography
Cambridge University. * Video on metallograph
Metallography Part I - Macroscopic Techniques
Karlsruhe University of Applied Sciences. * Video on metallograph
Metallography Part II - Microscopic Techniques
Karlsruhe University of Applied Sciences. Materials testing Metallurgy