Bombardment in the Second Boer War on:
[Wikipedia]
[Google]
[Amazon]
The

Second Boer War
The Second Boer War ( af, Tweede Vryheidsoorlog, , 11 October 189931 May 1902), also known as the Boer War, the Anglo–Boer War, or the South African War, was a conflict fought between the British Empire and the two Boer Republics (the South ...
saw attempted application of bombardment
A bombardment is an attack by artillery fire or by dropping bombs from aircraft on fortifications, combatants, or towns and buildings.
Prior to World War I, the term was only applied to the bombardment of defenseless or undefended objects, ...
as an alternative to the use of ground forces. In most battles fought during the conflict this was proved not to be possible. There was competition from the other side's ability to undertake evasive measures. The opponent was able to use cover to protect himself and hide his position. Nonetheless, the tactic of the creeping barrage
In military usage, a barrage is massed sustained artillery fire ( shelling) aimed at a series of points along a line. In addition to attacking any enemy in the kill zone, a barrage intends to suppress enemy movements and deny access across th ...
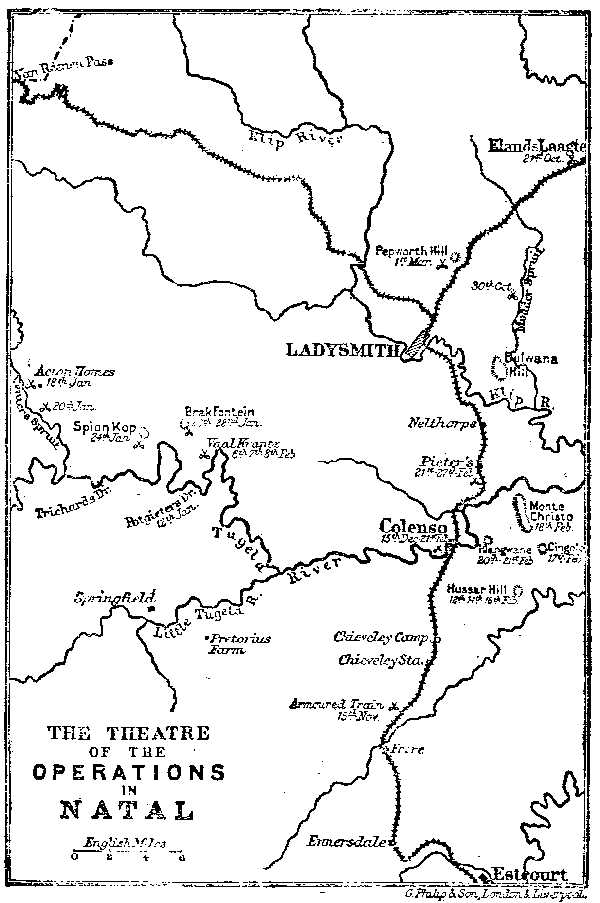
, used at the Relief of Ladysmith
When the Second Boer War broke out on 11 October 1899, the Boers had a numeric superiority within Southern Africa. They quickly invaded the British territory and laid siege to Ladysmith, Kimberley and Mafeking. Britain meanwhile transported th ...
, has been described as "revolutionary".
Battle of Magersfontein - 11 December 1899
The barrage involved twenty-four field guns, four howitzers, and a 4.7 inch naval gun, dubbed 'Joe Chamberlain', in honour of the British Colonial Secretary. "Onlookers were told by the naval gunners that Old Joey would kill every man within 150 yards of where his shells struck." However, the bombardment that targeted the hill did not hit the Boers. The British had poor intelligence. The Boers were not hiding on the hill but in a line of trenches close by. It was to be another three months before the Boers finally evacuated, not because of bombardment, but because the British passed round them.
Battle of Colenso - 15 December 1899
Here too, the British lacked intelligence about enemy positions. Before the battle, the Boers were hidden and their numbers or positions could not be estimated. In battle, smokeless fire meant that their positions were difficult to locate. Boer guns were also concealed behind emplacements, a practice that was new to late nineteenth warfare.Relief of Ladysmith - 14–28 February 1900
The British had success when they ceased using artillery by itself and used it in conjunction with infantry. British General Buller linked the use of artillery and the movement of infantry into continuous interlocking assaults upon each hill south of Ladysmith. As soon as shelling had finished in a location the infantry moved. The front collapsed on the 27th when use was made of a creeping curtain of shell fire sent over the heads of advancing infantry destroying everything 100 yards ahead of them. It was this tactic of the creeping barrage that has been described by Pakenham as "revolutionary".Pakenham, 1992: 361Notes
Sources
Thomas Pakenham, ''Boer War'', London: Abacus, 1992.See also
*Battle of Paardeberg
The Battle of Paardeberg or Perdeberg ("Horse Mountain") was a major battle during the Second Anglo-Boer War. It was fought near ''Paardeberg Drift'' on the banks of the Modder River in the Orange Free State near Kimberley.
Lord Methuen a ...
* Second Boer War
The Second Boer War ( af, Tweede Vryheidsoorlog, , 11 October 189931 May 1902), also known as the Boer War, the Anglo–Boer War, or the South African War, was a conflict fought between the British Empire and the two Boer Republics (the South ...
{{DEFAULTSORT:Strategic Bombardment in the Boer War
Second Boer War